 April 16th, 2018
As product and UX professionals we all know the importance of getting our designs in front of our target Persona. Being able to see over their shoulder as they thumb, tap, swipe, and navigate their way around, is essential in being able to quickly identify issues and make quick iterations to improve the product.
State of the art user testing platforms like Userlytics allow you to launch multiple iterative tests with real people, in their homes and offices, with almost instantaneous responses.
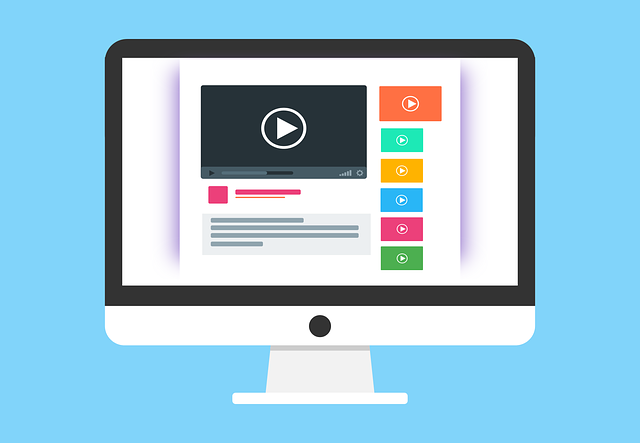
Furthermore, platforms that deliver not just quantitative data but also rich qualitative insights through picture-in-picture video recordings (webcam view, + screen + audio) enable a quantum leap in the details and insights that can be uncovered.
The challenge is how to analyze the resulting hours of video results in a time effective and scalable manner."
Leveraging platforms that are efficient in analyzing qualitative and quantitative data is imperative to identifying the insights necessary to inform your product changes. All the information in the world is only valuable if you are able to quickly convert it into actionable insights in a cost efficient and scalable process.
Userlytics provides a suite of tools that allow you to quickly review participant UX video session transcriptions, in multiple languages, browse and/or search key terms, leverage time stamping & hyperlinking to quickly locate and deepen your understanding of the most interesting actions and comments, and then add & share hyperlinked and shareable annotations, as well as create & share individual clips & highlight reels. Here are 3 ways to quickly review and analyze your participant sessions.
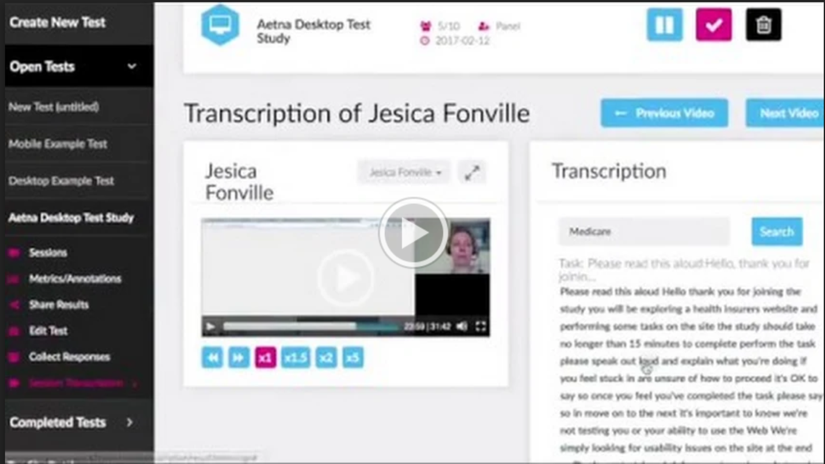
Video transcription provides you a unique way to quickly scan through your participant session and identify key moments quickly without watching the entire video. You can browse through each task or question and review the verbal commentary. Or, you can search specific keywords and jump directly to those key moments.
As can be seen, Jesica spent over 30 minutes on this user experience test. Utilizing the transcription tool, you can save hours of time, and avoid having to fast forward and rewind through each user session to find the events and comments of most importance
As participants speak out loud, they have a lot of pauses and breaks as they complete each task. This adds a lot of time to the overall session and makes finding those key moments a bit harder. The transcription capability allows Userlytics clients to click anywhere and have the video start at that exact moment. You can read ahead, or skim through the tasks and find specific areas to see exactly what the user is doing by just clicking on the text.
For non-native speakers on a team, it can often be a bit more difficult to listen and follow along as the participants speak out loud. With the Userlytics transcription capability, they can read the text, ensuring they are able to understand and comprehend the user feedback.
When Userlytics clients run tests, we recommend running them with a minimum of five participants, as a generally accepted rule in the Usability testing field is that 5 participants will uncover approximately 80% of the issues. That said, we usually advise ten to fifteen participants, and sometimes even larger numbers, depending on how many times our client will be able to repeat a test in an iterative manner, as well as how mission critical the use case and customer journey is.
Once a Userlytics client has launched a test, the participants have completed it, and the Userlytics Quality Assurance team has reviewed and approved the video, the client is notified and can start reviewing the results.
Under ‘Open Tests’ or ‘Completed Tests’, select the test you want to review, and navigate to “Session Transcription” on your dashboard.
Select the video you want to transcribe, scroll down, and click “Transcribe Selected”
You will receive a notification once the transcription has been completed. Navigate back to the “Session Transcriptions” link, and to the right of the participant video, and then click on “Access Transcription”

Now that your video transcription is complete, you will see the video to the left and the transcription, divided by each task and question, to the right. You can review the text, search specific key words, and click anywhere to prompt the video to begin playing at that specific moment. Here is a brief step-by-step tutorial on how to review your transcription efficiently.
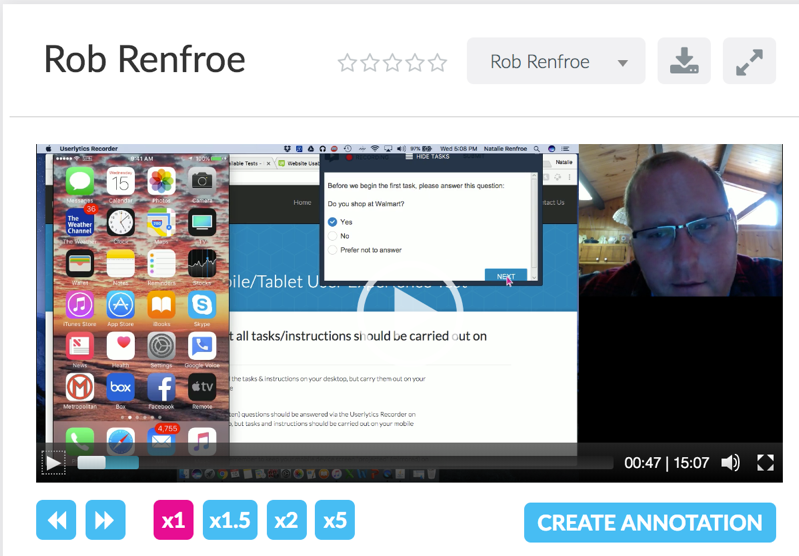
Aside from the video transcription service, we also provide a fast way to skim through each session video, by toggling the review speed. The default speed is 1X, but you can increase the speed to 1.5X, 2X, or 5X. Our clients frequently leverage 1.5X or 2X so that they can still hear & understand the verbal commentary of the participants, however, 5X speed is a great way to quickly skim through the video to a specific area you are interested in. As an alternative, you can also click on a specific task or question to go directly to the section of the video.
It’s never fun to watch the same video over and over and struggle to find the exact moment you need, but Userlytics has an easy-to-use annotation tool.
You do not need to pause the video while creating annotations. Simply start typing the Title or Description and the "Start Time" of the Annotation will be set automatically. The "End Time" will be set automatically when you save your annotation (You can subsequently edit both the "Start Time" and the "End Time" if you wish).
Once you create an annotation, it is viewable (and hyperlinked to the relevant timeline moment) both within the specific UX test session as well as in the "Metrics & Annotations" area. This allows you and your team and stakeholders to quickly skim all of the annotations and instantly click on those of interest to jump to that specific participant UX testing video and that key moment.
If you haven’t caught on, Userlytics really likes to find ways to save you and your colleagues time. That’s why Userlytics also provides you with a highlight reel functionality. Once the User Experience Testing videos have been reviewed and annotated, you can download specific clips of interest (based on the "Start Time" and "End Time" of each annotation), or a highlight reel video that aggregates all the key moments you annotated into one, easily shareable video. Rather than watching an entire 30-minute session (or many of them), you and your colleagues and stakeholders can watch an optimized video of key events and comments. And you can even automatically include the titles of each annotation as subtitles in the clips and highlight reel!
As mentioned, leveraging platforms that are efficient and scalable in analyzing your qualitative and quantitative UX Testing Data is imperative to identifying the insights necessary to inform your product changes. Userlytics provides a suite of User Experience Testing tools to help you be successful in not only launching cost-effective and scalable user tests, but also to transcribe & review the participant sessions, analyze & annotate the UX results, and pull key UX insights in a timely manner that are shareable amongst your colleagues and clients.
To get started with launching your first user experience test today, click here to schedule a demo.